Quest to Upgrade Laptop: The beginning
Pep Talk #
I’ve had this Dell XPS 15 laptop for 4 years. It brought me through college on a 256 GB SSD. I used an external HDD once it started to get full. I managed my storage judiciously, with the strictness of a Mormon.
Sometimes I get the itch to upgrade to a desktop with a better graphics card to play new games, but seeing how the supply chain is right now, it’s gonna cost an arm and a leg. Instead of getting FOMO for new games, I could simply opt for older or indie games. There’s a whole world out there that isn’t GPU-bound.
The battery has long failed, but that’s a flaw with lithium ions and not the computer.
In an effort to fight against manufacturing churn and for the health of our planet, I should buy as little as possible. I don’t need a new chassis, a new motherboard, a new processor, a new screen, nor a new keyboard.
I intend to dual-boot Linux. Windows will be used for Windows-only programs, while Linux will be for everything else. Linux is good enough as a daily driver for browsing the internet, checking email and chatting. It also takes less energy to run, thus you get more bang for your buck from your hardware. Your hardware will last longer (or at least take more abuse before failing).
While switching to Linux is a learning curve, I’m interested in sustainability and reducing my costs. Unfortunately, I won’t be able to play AAA games, but I don’t have much time for them anyway.
While laptops are more difficult to upgrade than desktops and it’s discouraged, there’s no better way to learn. There’s always a chance to brick your computer if you screw up, but remember that all parts are engineered to be resilient enough for human operators to assemble. Barring any serious mistakes, you can do most things yourself.
Procure parts #
Getting hardware that matches is an exercise in patience and googling acronyms. For example, Random-access Memory (RAM) is also just called memory.
If you’re starting from Windows like I am, you can press [Windows Key] + [R], type dxdiag and hit [Enter]. This will bring up a screen that tells you the names of your components.
Once you get your computer’s model, search for the manufacturer’s specifiations and installation instructions (For example, the Dell XPS 15 9560 Documentation service manuals).
The model I own came with a 250 GB M.2 NVMe SSD, an i7-7700HQ processor and 8 GB RAM, and the smaller 56Wh battery. Before I purchased this model, I knew they had offerings with 1TB HDD storage space. Hence, there should be enough space for another SSD, and even a mounting frame was included. I’ve opened up my computer before to clean the fans, so I saw the empty bay for myself.
| Component | Part |
|---|---|
| SSD | SAMSUNG 870 QVO Series 2.5" 2TB SATA III |
| SATA Cable | XDYGX - Cable, Hard Drive, SATA 7MM |
| Rubber bumper | 3XYT5 - Grommet (I got a set from here) |
| Wifi card | Intel Wireless-Ac 9260 |
| RAM | Crucial 32GB Kit (2x16GB) DDR4 2400 MHz CL17 Laptop Memory CT2K16G4SFD824A |
| Thermal Paste | Grizzly Kryonaut |
| Exta Screws | Order extra screws that will be involved, because it’s better to have them than to do without. I googled for “[LAPTOP MODEL] screw list”. |
SATA SSD: BvilleBound did the research to find what needs to be ordered to install an extra SSD, which means I have to buy a separate connector cable. Unfortunately, anyone who bought an XPS with a larger battery (the 97Wh) would not have the mounting frame included. There’s also a model with a 32 GB NVMe SSD that’s only for caching, and I have no idea what it takes to reconfigure it if you wanted to upgrade.
No Battery: The battery of the XPS series has historically been crap, so I’m not replacing it. In fact, power regulators will throttle performance when the battery health turns bad, and these days, batteries are always turning bad.
For portable computing, a tablet, e-reader or phone are convenient and easier to get external batteries for. Plus, I could use the money for another harddrive to make backups, or for something useful like a multi USB port.
The 3-cell (56 WHr) battery part number is H5H20. Just for reference.
Wi-fi and Bluetooth 5: The stock Killer wi-fi card is known for being terrible, and sometimes it disconnects in short spurts, so I’ll replace it with a newer model.
Install latest drivers #
- Update BIOs
- Update Chipset
Switch disks to ACHI mode #
By default, the XPS uses Intel’s RAID technology for disks, but Linux requires ACHI. If you want to dual-boot, follow the instructions in this order, otherwise you’ll have to reinstall Windows.
- Disable BitLocker before starting
- Remember your PC password (not PIN), or else you would be stuck in safe mode forever (with this way of entering safe mode).
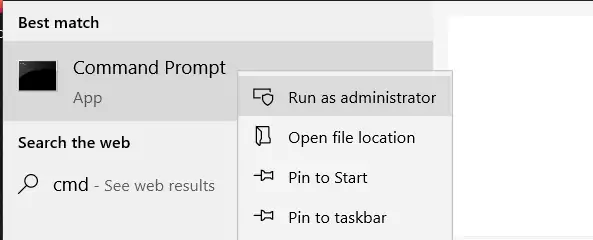
- Run cmd as administrator
- Click on your Start Menu and type
cmd. - When the Command Prompt shows up, right-click and select Run As Administrator.
- Click on your Start Menu and type
In the terminal, run this command (keep the curly brackets):
bcdedit /set {current} safeboot minimal
If the command doesn’t work, try it without
{current}
- Restart the computer and enter UEFI/BIOS setup.
- Change the SATA operation mode from RAID to AHCI.

Save changes and exit Setup and Windows will automatically boot to Safe Mode.
Launch cmd again, as in step #1.
Enter this command…
bcdedit /deletevalue {current} safeboot…which returns to Normal Mode.
Reboot.
Windows will notice the change to AHCI if you boot into Safe Mode first, then load the correct driver on the next normal boot. Otherwise it will fail on normal boot.
Source: LinuxSecurityFreak on StackExchange
Pre-download software #
- Backup current drive
- Create a Windows Media backup
- Download wifi-card (Intel Wireless-Ac 9260) driver for Linux (just in case, so you don’t get locked out with no internet access)
Download Linux distro of choice #
You will need:
- A spare USB (8 GB to be safe)
- A flasher such as Rufus for Windows or Balena Etcher to create a live install (AKA bootable media, bootable drive, live os, etc.)
Overview of steps:
- Download
.isofile - Verify download is not corrupt or damaged
- “Burn to disk.” In modern times, we flash a USB.
Here’s my rating of Linux distros that are aimed at consumer-friendliness:
- Pop!_OS - Comes with drivers out of the box and a hands-free setup.
- Elementary OS - MacOS alternative for those who like that aesthetic.
- Zorin OS - Similar to Elementary.
- Ubuntu - The previous 3 are based on this distro. Ubuntu has won the market share of a majority of developers and it has a great UI too, but still “hackier” than the others.
- Manjaro - Arch Linux but friendlier, this distro may need more troubleshooting for drivers, but it’s also lightweight and makes less assumptions about your setup.
Take your time to research, pick a distro that sounds right your for needs, go to their website, download their .iso.
Verify the download is correct #
On some websites, you may see files with a SHA hash given, for example, "To ensure the integrity of your download, please verify the checksum value.. Internet interuptions, free-floating particles, or in an unlikely case, hackers who infiltrated the provider, can change the file.
We will assume that the providers haven’t been hacked, but we want to check for corruption. On Windows, run CertUtil in cmd:
certutil -hashfile <NAME_OF_FILE> <ALGO>For example, Manjaro offers their hashes in SHA1 algorithm. At the time of writing, the hash for xfce-21.1.4 is f5a0747dba599984237884fc47453ed1d43f5da7.
The command would be:
certUtil -hashfile C:/User/NAME/Downloads/manjaro-xfce-21.1.4-210927-linux513.iso SHA1Wait until it completes. You should see the exact same hash as provided by the website. If any character differs, then redownload the file.
Flash USB #
Here is a basic flash guide which covers Linux Mint, but the process is the same for all distros.
Prep done! #
It’s a waiting game for the parts to be delivered. Take a look at this Kris De Decker’s article which discusses similar sentiments on laptop waste.
Intel considers offering online services within the chips itself.
Intel Software Defined Silicon (SDSi) is a post manufacturing mechanism for activating additional silicon features. Features are enabled through a license activation process.
The questionable profit models of giant companies offering -aaSes of everything needs to be balanced out with consumer controls. Given how Intel wants offer subscription services for their chips, I don’t want to support companies trying to sell handcuffs as a good thing.